In this day and age of digital entertainment, the associated files that are edited to bring you amazing still life imagery or high-definition video require high performance peripherals. With a large amount of digital content producers being out on location and not in the comfort of their studios, their devices need to be portable without sacrificing performance. This is where I believe the WD Passport Pro can be of help, as a portable storage solution that can help take your digital editing to another level on the road.
Offered in capacities of either a 2TB or a 4TB, coupled with the speeds of a Thunderbolt interface, the WD My Passsport Pro seem to offer storage in all the right places.
Features and Specifications
The Western Digital (WD) My Passport Pro is design specifically for a Mac, as the only interface it has for connectivity is a single Thunderbolt connection. Unless your PC desktop or notebook has such a port.
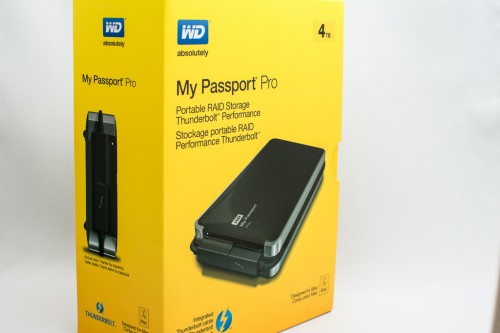
There are 2 flavours of the WD My Passport Pro: one in a 2TB size and the other in the 4TB size. The 4TB size is the one we will be looking at for this particular review.
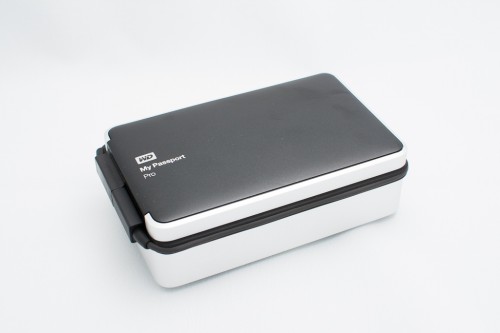
The 4TB unit measures in at a height of 44.2 mm with a width of 88.5 mm and a length of 143.4 mm which does make it fairly portable for its 4TB size, though it does weigh in at a hefty 0.72kg, which feels almost as heavy as my 2011 13″ Macbook Air.
The WD My Passport Pro 4TB consists of two 2 terabyte (TB) 2.5″ hard drives which can be configured to maximize performance with RAID0 (stripping) or help keep data safe with redundancy in RAID1 (or mirroring). If you want to utilize both drives separately it can also be configured for JBOD and you will have two separate 2TB drives on a single interface.
The WD My Passport Pro series of portable storage utilizes the Thunderbolt interface for lighting fast speeds. Both the 2TB and 4TB boast up to 233MBps (that is Megabytes not Megabits) read and write speeds.
Currently, the WD My Passport Pro 2TB retails for $299CDN and the 4TB retails for $429CDN with a 3 year warranty.
What’s Inside the Box?
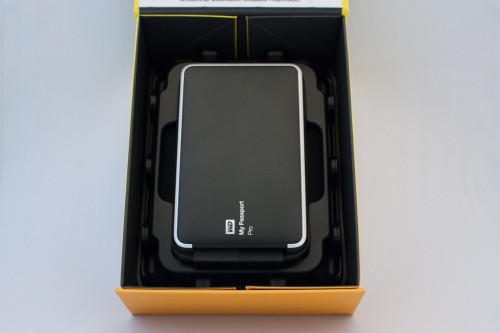
The box itself is of sturdy cardboard construction. You open it up by first removing the outer sleeve and then open up the top flap which stays attached via a small magnet. Inside, the WD My Passport Pro 4TB sits nestled in a injection-molded base with the included Quick Start Guide underneath. This design limits any sliding around while in transit between Western Digital and you.
There is not a whole lot extra included inside the box; you get the Passport Pro hard drive, a very short Quick Start guide (3 steps in total) and of course, the warranty card with the limited liability information. All other info/software/drivers, are located on the website these days.
First Impressions
The very first thing I noticed when I took the My Passport Pro out of its fancy packaging was the weight. I’m used to a single 2.5″ drive in a small external enclosure, but this 4TB setup is a bit on the hefty side. This does come with two, 2TB drives, so I can see why it would be heavier than a single 2.5″ external drive.
Yes, the drive itself is small compared to its total storage space, but I guess you can’t have it all right? Placed next to my Samsung Galaxy S3 for a comparison, their length and width is close, but the Passport Pro obviously is a bit taller. Still the physical size of this drive for being 4 TB and supporting a couple of RAID configurations is pretty impressive.
What I was also looking forward to is checking out the speeds one might be able to obtain with the integrated Thunderbolt cable. Yes, you don’t need to go out and buy a separate cable for this device, but at the same time, that integrated cable could also be a potential issue if it breaks. Thunderbolt is theoretically able to obtain speeds of about 10 Gbps bi-directional, but in the real world, we’re expecting to obtain the 233 MBps that WD says is possible.
You may also notice the small exhaust fan on the back of the housing, unless your are putting the drive though its paces you may never notice it. When benchmarking the drive and trying to push the read and write of the drive, the fan eventually would kick in. With the product having two 2.5-inch drives so close in proximity within the housing, it is nice to see a way to try and help keep things a bit cooler.
Let’s find out what the installation and setup experience is like.
Test System Setup
The WD My Passport Pro with its Thunderbolt connection, realistically, limits it to Apple Macintosh computers running OSX. Although, PC notebooks and desktops do exist with such a connection, albeit rare.
In this particular test setup, a 2011 13-inch Macbook Air was used with the following specifications.
- Processor: Intel Core i5 1.7GHz dual-core
- Memory: 4GB 1333MHz DDR3
- Storage: 128GB SSD
- Graphics: Intel HD 3000
The great thing about being an external drive is you just plug it into one of your available Thunderbolt ports. For me, that means using the only Thunderbolt port that this particular Macbook Air has available. One day I should look at getting one of those Thunderbolt docks I hear so much about so I can truly make use of the Thunderbolt experience, as well as add some much wanted USB3.0, but that’s a topic for another day.
With the drive being formatted in HFS + J and being in RAID0, it is ready to go for MacOS once you plug it in. It does come with some utility software for which you can load right away. I would suggest copying the install file to another location (off of the drive) for future retrieval as if you format the drive or reconfigure it, you will lose the installer for the utility software. Although you can retrieve it from the download section on their website at any time.
Installation and Setup
The WD utility software is fairly straight-forward and allows you to run some diagnostics, such as a S.M.A.R.T Status scan, Quick Drive Test as well as a Complete Drive Test.
The next option you can choose is the RAID configuration. Here you can choose RAID0 (Stripping) or RAID1 (Mirrored), or even JBOD which is to make both internal drives act independently.
Following RAID configuration is the Erase option. You can erase the drive and select the file system it will use (either HFS+J or ExFat). They also include a secure erase if the data you have stored on your drive is of sensitive nature.
Right out of the box, the Western Digital My Passport Pro was formatted in the RAID0 configuration. The software utility that comes with the drive is fairly simplistic in nature, there are not a lot of options when selecting which configuration you are wanting to use. I found, for my particular interest, I would keep to the RAID0 configuration. Any advanced options you may want to try, you will need to look to a separate 3rd party hard drive utility.
Now that we have it working, let’s run the benchmarks!
So How Does It Perform?
The easiest way to test how it can perform is to run a few bench tests. Due to some issues being had with Blackmagic Disk Speed, I opted for AJA System Test. Primarily choosing the following video resolutions of 4k, 1080 and 720 all at 10 bit and 8 to 4GB file sizes to try and put the drive through its paces of reading and writing. After all, we’re interested in the performance of the read and write correct?
WDl claims that one will be able to obtain up to 233MBps in read and write performance with their My Passport Pro 4TB drive. I was glad to see that the drive could average 200MBps on both read and write. Having a company say what you should be able to get out of their device performance wise, and then actually being able to do it, is a great checkmark in my book. No matter which size of video I used or what resolution I choose, the drive would perform exceptionally well.
Final Thoughts
The WD My Passport Pro 4TB Thunderbolt drive does what it says it will do, and it does it without sacrificing the read and write performance. The ~200MBps read and write speeds will keep you editing high-definition videos without having to worry about running out of room. In my particular case, the My Passport Pro will allow me to edit my camera’s RAW files (approximately 25MB each) without a laggy experience that my current USB2.0 drives give me. I also don’t have to worry about running out of room anytime either as 4TB is quite the storage space for mobile use. I am giddy to make use of this Thunderbolt port more frequently now that I have something to plug into it.
The WD My Passport Pro does occupy the only Thunderbolt port I have on my Macbook Air and the weight of the drive might deter some people. It also, does not have a pass through, allowing daisy chaining of other Thunderbolt devices, like some other products on the market. But it is a lot of storage and performance in this footprint.
If you’re looking for a portable external storage solution, one that does not rely on the use of an Internet connection, I would recommend getting your hands on the WD My Passport Pro 4TB drive with Thunderbolt. If your needs don’t require the speed of the RAID0 configuration, but you want the redundancy of the dual internal drives in RAID1 configuration, then this is also a great solution to look at, for an on the go solution. Especially since it does not make use of an external power source, as it draws its power through the Thunderbolt cable. And when you’re on the go, it’s nice to have one less cable to carry, or forget, right?
Pros
- Real Thunderbolt transfer speeds of up to 233 MBps
- Integrated Thunderbolt cable means one less thing to buy
- RAID 0, RAID 1 or JBOD configuration
- Relatively small foot print for storage of this size
Cons
- Integrated Thunderbolt cable, could be a point of failure (not user replaceable)
- Weight is on the hefty side for a portable
- No extra Thunderbolt port on device for daisy chaining
Overall Rating: 9.0 / 10.0
Help Us Improve Our Reviews By Leaving a Comment Below!


