Installing the 3.5 inch Rack

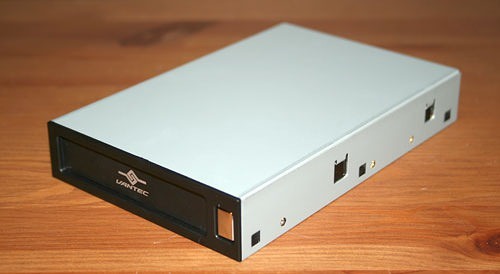
Installing the 3.5 inch rack starts out as easy as installing the 5.25 inch bay bracket. In fact, the 3.5 inch rack sits inside the plastic 5.25 inch bracket. Once you remove the 5.25 inch bracket, you can install the 3.5 inch caddy in a standard 3.5 inch drive bay. Sounds easy enough, however, it wasn’t all roses. I went from too much wiggle room using the 5.25 inch bracket with the 3.5 inch rack to having to push pretty hard to get the bare 3.5 inch caddy into the drive bay. The drive was also fairly snug when inserting it into the rack and ejecting the drive required a stiff push. This is necessary so that the delicate connectors don’t deviate from their intended trajectory and could possibly be damaged.

After attaching the SATA cable to the appropriate header on the motherboad, it was time to power up the computer. During boot up, the drive was recognized as just another hard drive in the BIOS. Now it’s time to put its SATA and USB capabilities to the test.
SATA Performance

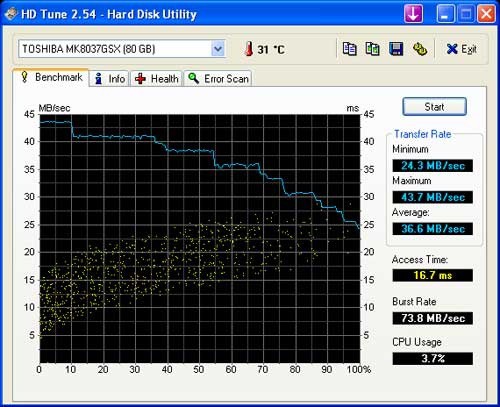
I found that that the SATA speeds of the drive to be quite reasonable since along the way it has to make two connections before it actually gets to the drive itself. I also found that the ratings on the HDTune website for the particular drive I was using to be consistent with what other people have benchmarked. This helps ensure that the product is working properly.
USB 2.0 Performance

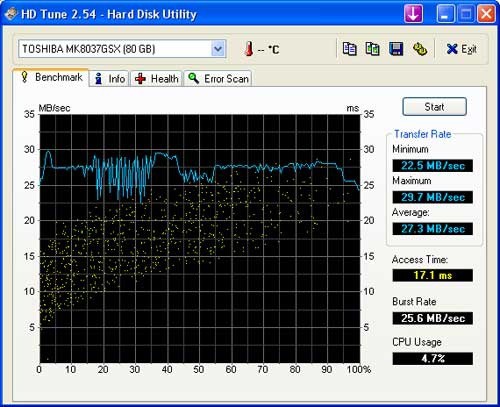
The USB side benched to be roughly half of what the specification for USB 2.0 sets (60MBps) at an average of 27.3 MBps but according to Wikipedia some vendors only have claimed their rates are only at most 40 MBps where as most seem to hang around the 10-20MBps range so this tells me that the USB 2.0 functionality of this product is actually quite good.
Real-Time Price and Stock Check – Shop Like a PRO!
