Installation and Setup
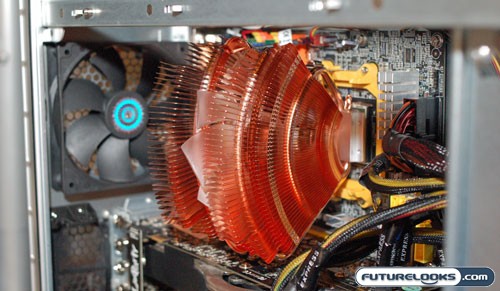
The installation and setup of the Thermaltake V1 Cooler was fairly easy since it does not require the disassembly and installation of a motherboard bracket like other high-end coolers. The V1 uses the stock INTEL and AMD mounting mechanisms. However, installation wasn’t without its issues.

Although clearance was not an issue in our setup, due to the bottom mounted power supply in our CoolerMaster Cosmos 1000 case, I could see the possibility for the cooler to contact the crossbar in some cases. Motherboards that place the CPU cradle closer to the edge could cause the V1 to contact top mounted power supplies.
The extra weight of the cooler (V1 = 637 grams vs. 348 grams = Stock) combined with the standard cradle was cause for some concern. I’ve actually had the cradle clips snap on other heavy coolers that use the stock clips. Once snapped, the cooler would crash into the back of a running video card and cause CPU temps to skyrocket. Though no permanent harm was done, it could have caused a short circuit, sending your high powered video card to the high powered trash compactor.
During assembly, I found it very difficult to line up the retention clip with the cooler and the AMD CPU cradle. Since the AMD clip did not have any sort of self centering mechanism, and just sort of hangs there free, I found myself fiddling with the clip quite vigorously, often contacting the sharp edges of the fins. When I finally got the clip to close down, the cooler itself would end up crooked. Closing the clip and making sure the cooler was square to the CPU at the same time was impossible. I had to manually crank the CPU cooler square to the cooler. What I would have liked to have seen is a way to attach the clip so that you aren’t fiddling around so much. This makes the V1’s INTEL mounting bracket a little more compelling because the bracket sits outboard, and can be reached without having to bump around under the V1’s fins.

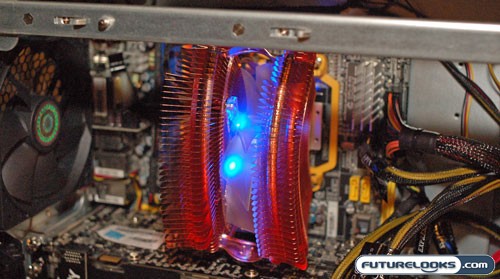
Nontheless, we got it attached, and we got it centered with quite a bit of twisting and torquing. This definitely can’t be good for the stock plastic cradle and it’s two plastic clip points. After a final check, we got to see how it performs compared to the stock AMD cooler that came with our X2 4200+ CPU. Yes folks, in Thermaltake style, the cooler glows some funky color courtesy of Blue LED’s.
Performance
In order to evaluate the performance of the V1, we closed the door on our CoolerMaster Cosmos 1000 case, and took some quick readings of the thermal performance of the cooler at idle with both the fan cranked and set to low. Readings were taken six inches away from the side panel, directly above the cooler. Here are our results…
- Low Setting: Temp = 46 C , Noise = 41 dBA
- High Setting: Temp = 45 C , Noise = 45 dBA
At idle, the temperature is improved over the AMD Stock cooler by a whopping 11 C degrees with the fan at the lowest setting. At the highest fan setting, there was only a one degree drop in temperature, but it was followed with a 4 dBA increase in noise and it was VERY noticeable. Hopefully the high fan setting does more under load. To establish load conditions, we ran 3DMark2006 for an hour using its built in CPU benchmark. We took readings with the fan at its highest and lowest settings. Here’s what we found out:
- Low Setting: Temp = 57 C , Noise = 41 dBA
- High Setting: Temp = 57 C , Noise = 45 dBA
Since the fan speed is manually adjusted, we did not expect any change in noise levels from the idle readings. However, what we were disappointed with was the fact that the increased fan speed did nothing to increase performance. It only served to increase noise levels. Compared to our stock AMD cooler, which roasted at 72 C under load, the 15 degree drop in temperature was pretty impressive. Although I appreciate Thermaltake for providing fan speed adjustment, it was a pretty useless feature under our test conditions.
Real-Time Price and Stock Check – Shop Like a PRO!
