Taking a Closer Look (And Trying Not to Cut Myself)
The Thermaltake SpinQ doesn’t quite follow the design of many other radial fin coolers. Your typical radial fin cooler is a basically a round fan of fins with a standard 92mm or 120mm fan blowing over them front to back. Heat is transferred to these fins via a couple heatpipes that will usually run the circumference of the fins. Zalman’s line of coolers are a good example of this design, and show how the SpinQ differs.
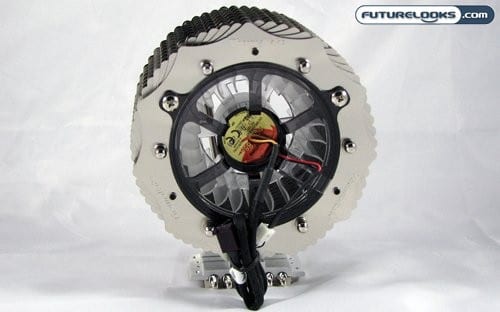
As noted earlier, Thermaltake’s cooler consists of a row of fins with a hollow centre. Heat is transferred to them by way of six heat pipes, which are copper coated with some material to make them shiny. The whole rig is cooled with a radial fan that is used to blow air outward over the fins, similar to the way the cooling fan works on most modern video cards.

The fan is powered by a 3-pin connector that plugs into your motherboard. Thermaltake decided to skip using a PWM fan, which would be controlled by the motherboard and be affected by how hot the CPU got. Rather they connected it to a manual dial, allowing you pick whatever fan speed you wanted. Though the tiny dial does have a broad range of speed adjustments, it’s left to simply dangle in your case. This is unusual for Thermaltake, as many of their previous coolers would include a fan speed controller that could be mounted outside the case in a rear slot. It’s also somewhat annoying, as you have to open your case to adjust the speed on what is a rather expensive cooler.
At least you can wedge the controller into one of the many fins to keep it out of the way.
Installation
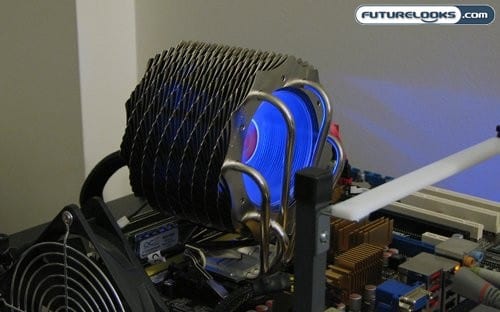
Installation was remarkably easy. The Thermaltake SpinQ utilizes the default AMD retention bracket found on all Socket AM2, AM2+, and AM3 processors. The included clip doesn’t attach to the cooler the say way the Intel clip does, but it does do a very good job of holding the cooler down and in place. This clip and retention mechanism is similar to the one found on another one of Thermaltake’s most recognizable designs, the fan like Thermaltake V1 Cooler.
Intel installation will of course require removal of your motherboard, unless you stumble across a case that grants easy access to the back of the CPU socket like a CoolerMaster HAF 932. Cutting a hole in the back of a motherboard tray. Go figure.
The Test Rig
To test the Thermaltake SpinQ Heatpipe CPU Cooler we hooked it up to our standard test rig, which consists of the following components.
- AMD Phenom II X4 965 Black Edition CPU
- GIGABYTE GA-MA790FXT-UD5P AM3 790FX Motherboard
- Kingston HyperX 4GB DDR3-1600 Dual Channel Memory Kit
- ASUS EAH5850/G/2DIS/1GD5 Radeon HD 5850 Video Card
- Kingston SSDnow V-Series 128GB Solid State Hard Drive
- HighSpeed PC Top Deck Tech Station
- Ultra Products X4 1050W Modular ATX Power Supply
We used OCCT to test the thermal performance of the SpinQ. This tool allows us to push the CPU to a full 100% load for any amount of time we deem suitable. For the purposes of this test, the system was left to idle for 30 minutes to get it’s idle temperature. I then put the spurs to ‘er, running the CPU at 100% for 60 minutes to get the load temperature. This was done for both high and low speed, and the results were compared against what AMD considers it’s “stock” cooler.