The SG07 Chassis Inside

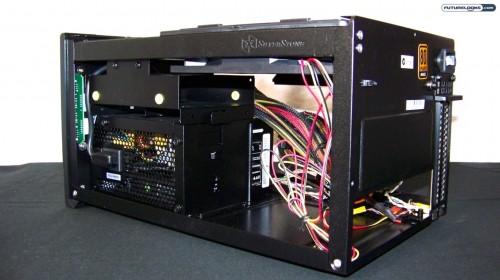
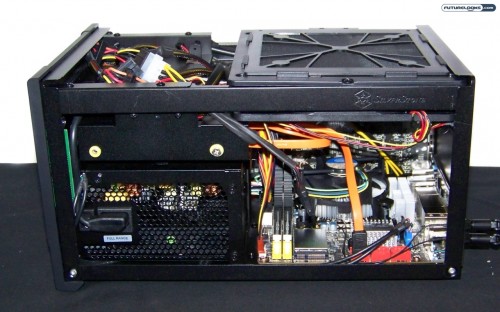
The inside of the SG07 boasts just how clever Silverstone’s engineers can be when designing for both form and function. There’s efficient use of space for storage devices and components, even with the seemingly large 600 watt PSU tucked in the front.
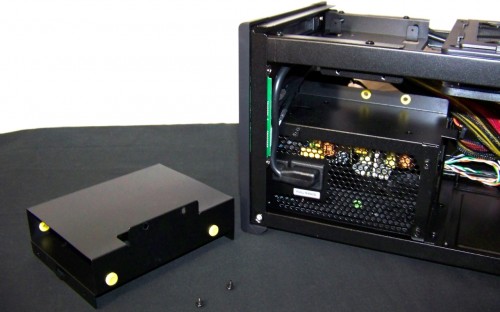
Above the PSU are the hard drive bays including the slim ROM drive tray. These can be easily removed via a couple screws. There are yellow grommet holes to help cut down on some hard drive vibrations and noise. You can see that the PSU is oriented so that it has access to cool air at all times.

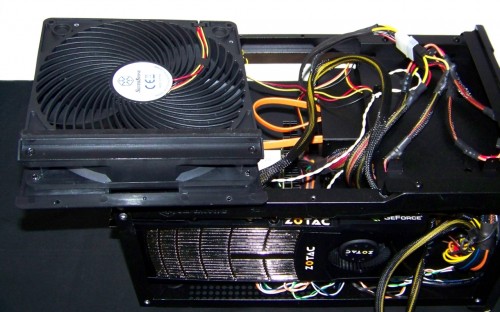
The top, back of the chassis holds the 180 x 25mm cooling fan snugly in place. It just requires a 3-pin power port like off the motherboard. The fan is easily removable in case you need to remove the rubber brace that is attached to the bottom of the fan. It’s a prevented measure for other sized cards, but can get in the way of the larger ones. We’ll show you what we mean right after we show you our humble set of test components.
Test System Specifications

We’re going with a rather powerful little m-ITX build here. Users can use our build as a very powerful Home Theater PC or one hell of a gaming PC. Check the specs out and you’ll see why.
- Processor: Intel Core i7-875K Lynnfield LGA1156
- Heatsink/Cooler: Stock INTEL Core i7 Heatsink Cooler
- Motherboard: ZOTAC H55ITX-C-E (Mini-ITX)
- Memory: Corsair Dominator 4GB 1600MHz DDR3 Dual Channel
- Graphics: ZOTAC Geforce GTX480 Video Card – w/Zalman VF3000F
- Storage: Kingston 128GB SSDNow V+
- Power Supply: SST-ST60F-SG (600 Watt)
- Software Testing Apps: OCCT and FurMark
- Software Monitoring Apps: SpeedFan and HWMonitor Pro
Typically, we use four sensors attached to the CPU cooler, chipset heat sink, video card, and PSU to get our test results. But, the SG07 doesn’t make that possible. So, I’ve opted to monitor those components using OCCT and SpeedFan. If the chassis offer’s any cooling benefits, the software should still give us reasonable results. Case noise was also monitored throughout testing.
Of course, our operating system of choice is Windows 7 Ultimate 64 bit. All of the latest available drivers and BIOS available as of this review were installed to ensure best possible results. But before we get to the testing, let’s compare some notes as we shoehorn these components into this little wonder.
Installation Notes

I didn’t find any issues removing or installing any of the hard drives. If you’ve installed them before, you won’t have any issues. There’s plenty of room to run cables even with the large 180mm cooling fan close by. However, that large fan does limit your CPU cooler options. A low profile heat pipe does the job nicely, but in a pinch, the stock INTEL Core i7 cooler in our setup does the job. The only real obstacle was installing the large GTX 480 video card into the tiny chassis.
The heat pipes on the GPU stand just a little too high and hit the 180mm rubber shroud. The fan can easily be removed via 3 screws. Plus, there’s 2 more screws that fasten the rubber spacer. Before installing the fan, it’s the ideal time to install the video card and connect the power cables. When its all done, it looks really cool.
