The Mouse Configuration
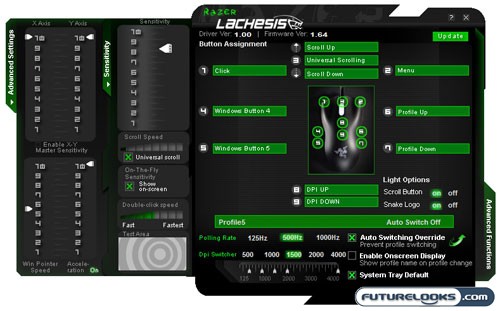
Once you have plugged in the Razer Lachesis mouse into an available USB port it will be recognized by the computer (hopefully) and at this time you can installed the Razer utility software so you can get into finer configurations for your bringer of death gaming mouse. On the main screen there are 9 buttons in which you can program via the Razer Lachesis Utility software and with these 9 programmable buttons there are a multitude of various actions you can assign to them to allow a better gaming experience. The main screen is also where you can change the DPI of the mouse in 125 DPI increments from 125 to a staggering 4000! You are able to set 5 DPI settings, by moving the 5 sliders, for each of the 5 profiles which gives you a great deal of customization when you need it.
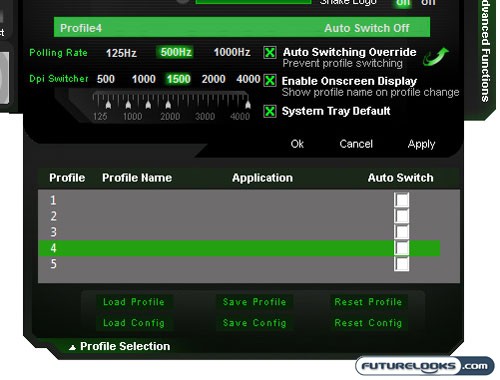
The main screen also allows your to toggle between 5 profiles in which you can assign various button configurations to. These profiles are the profiles in which the right-side mouse buttons are defaulted to switch between when you press them. The profile select button also cycles between these settings.
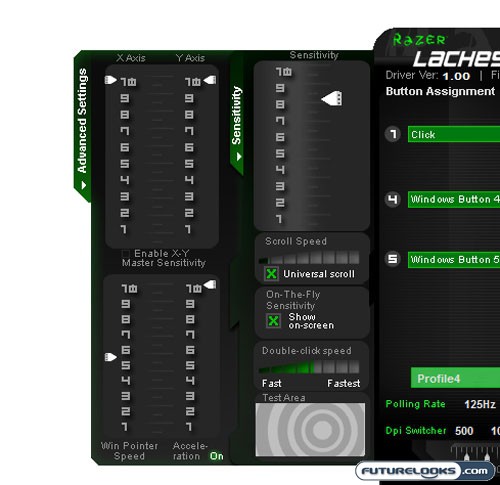
The other two slide out menus are for the Sensitivity and Advanced settings such as the axis speed and acceleration. If you play around with the acceleration and speeds you can really make the mouse move fast, in fact the slightest hand movement at higher speeds can make the mouse travel across my dual screen monitors at lightning speeds!
Real-Time Price and Stock Check – Check On More Products