What about the IntelliScan Button?
The OpticFilm 7500 Ai Slide and Negative scanner comes bundled with another imaging and scanning software from LaserSoft called SilverFast Ai Studio. If you have SilverFast AI Studio installed on your computer you can hit the “IntelliScan” button on the outside of the scanner and SilverFast Ai studio will automatically launch with the scan of the image for immediate image editing.
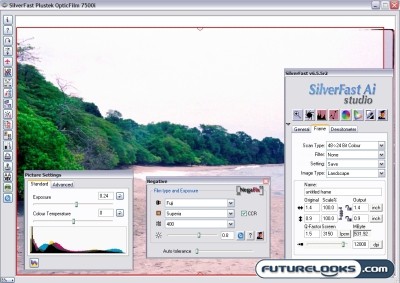
SilverFast Ai studio seemed to display characteristics of a very high end piece of image editing software. So much so that the options that pop up are quite dizzying. Each of the buttons that you see along the left of the main window and the all the option tabs in the smaller windows have many fine tuning options that you can optimize and change to affect the image. I had a really hard time trying to navigate around the windows and make the changes to my scans without somehow royally screwing them up. I believe these options and this software would be beyond the average user. I am sure if you were a trained graphics artist you would be more familiar with the imaging lingo, options and features. For me, I’d have to stick with the standards.
I also found SilverFast a bit confusing to install. When you start the installation program, the software asks you if you want to install the software for Photoshop/Stand-alone or TWAIN plugin as below:
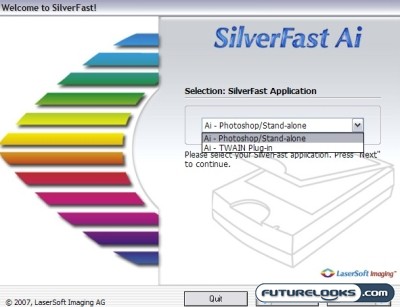
I interpreted this as, “If I don’t have Photoshop then I want the unit to work on its own – ie “Stand Alone”. I wasn’t immediately able to figure out what the “TWAIN” option implied and I don’t think the average person would either. In the end I installed both applications and everything seemed to work fine.
Scan Quality
Probably the most important question to ask is are the output files of this scanner any good? I have provided three examples below for discussion.
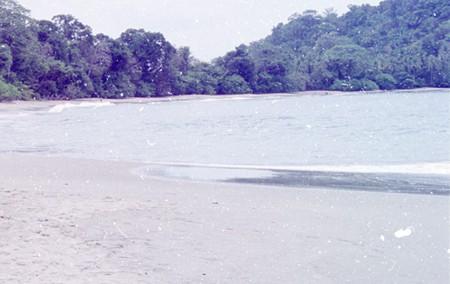
Crop of the 7200DPI scan
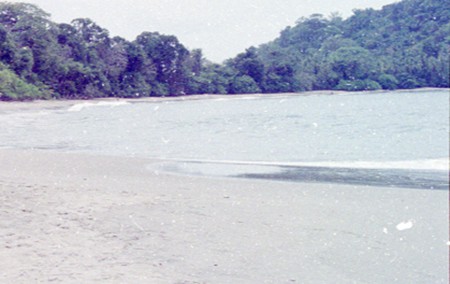
Crop of the same area at 600 DPI

Original 35mm developed print (for reference only)
The scanner is so detailed in the scanning process that it will pick up pretty much any foreign matter you have on your negative. In this case, the 7200 DPI in particular shows some serious dust artefacts that are not in the printed original. This leads me to believe that my negative was dusty or the internal scanning mechanism had some dust on the surface. You can see the dust and specs all over the scans; they look like snow!
The scanner in both 7200 DPI and 600DPI resolutions seem to wash out the colors of the photo. I find the colors and textures in the original picture much more rich than the scan. The trees in the original photo are much more of a lush dark green as with the emerald color of the water near the shore of the sand. The sand on the beach in the scans seem to be more white and washed out instead of being a textured, brown shade.
These problems are relatively easy to fix in most image editing programs. Lightroom, Photoshop and Silverfast all have a dust removal tool that will help with the dust specs. It is advisable to start with a clean and dust free negative if you can as it will save you time in post processing. As for the color, once the digital picture is in an editing program, you can pretty much mess around with the colors until you find something that is appealing to your eye, or as close to your print as possible. This is all great if you have lots of time on your hands, but it is sort of annoying that the scanner doesn’t give a file that is closer to the look of the original print as the washed out colors of the scans do need some tweaking. If the built in Silverfast Ai actually used some “Ai” and presented us with some easy to select choices, I think I’d be more inclined to use it, not to mention, save a lot of time.
