Power For The People

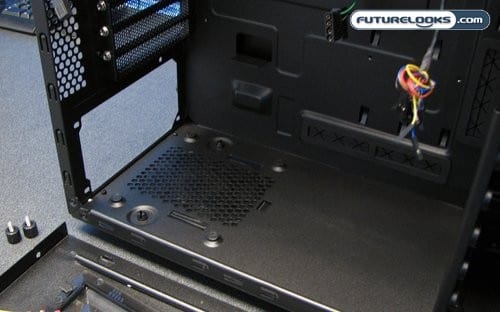
The bottom of the case houses the power supply mounts, as well as our first peak at the wire routing built into the motherboard tray. The PSU is mounted on four rubber posts; another attempt to keep the system as quiet as possible by dampening vibration through the isolation of parts that can potentially vibrate. For PSUs with bottom mounted fans there’s an additional vent with a removable washable fan filter in place.
The mounting of most PSUs with unfortunately partially block part of the low cable routing holes. Only some of the thinnest wires will be able to squeeze through here. Since the lower half of the mobo is usually occupied by such headers as USB and front panel, this shouldn’t be too much of an issue.

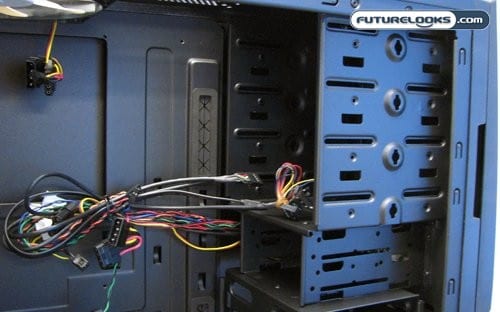
The thing I didn’t like about the mounting holes is how narrow they are. Most of the beefy connectors found on high end power supplies look like they won’t fit through, though we’ll have to confirm that when we install a system into this rig. As for drive mounts, there lots of room to mount plenty of gear in the LEXA S. The four external facing 5¼” bays are secured using the included thumbscrews, as is the one internal and one external 3½” drive bays. The four side facing hard drive bays all use rails for mounting; something else that will be showcased in installation.
Test System Setup
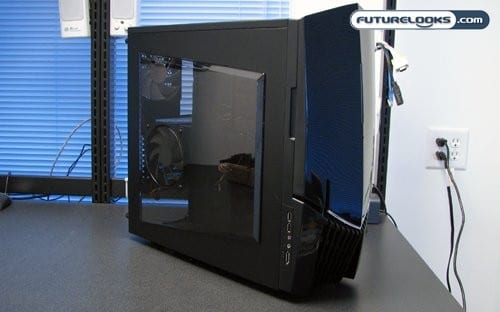
To put the NZXT LEXA S Crafted Series Black Steel mid-tower case through its paces, we decided to reach back and utilize some of the hottest hardware Futurelooks has ever reviewed. This was done with the idea of making the ultimate stress test rig. The list of components we pulled from days gone by looks something like this.
- AMD Phenom 9850 Black Edition CPU
- Asus M3A32-MVP Deluxe/WiFi-AP 790FX Motherboard
- OCZ 4GB PC2-8500 Gold Edition Dual Channel DDR2 Kit
- Sapphire ATOMIC Radeon HD 3870 512MB Video Card
- Western Digital VelociRaptor WD3000GLFS Hard Drive
- HighSpeed PC Top Deck Tech Station
- Mushkin XP-650 650W SLI/CrossFire Ready ATX Power Supply
- Thermaltake SpinQ Heatpipe CPU Cooler
The Tech Station is there for comparison, as I wanted to showcase the difference between open air cooling (ambient temp, best case scenario) and cooling within the closed environment of a case. As for benchmarks they will performed by placing a fair degree of load on the system, and measuring the temperature of some key components and the interior of the case. We used OCCT to place the required amount of load on the CPU, and 3DMark Vantage for the GPU. We also measured the acoustic properties of the case, since how loud a computer is tends to be important to a fair number of people. The results are next.
Installation Notes

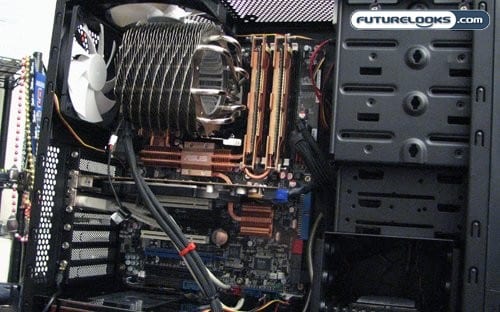
Installing a system into the NZXT LEXA S mid tower case is a fairly straight forward affair. The case does lack a removable motherboard tray, but there’s still plenty of room to mount a standard ATX motherboard. Sliding the mobo into position isn’t hindered by any weird drive bay placements. As for the mounting hole for CPU coolers I mentioned earlier, it does help tremendously when installing coolers that normally need motherboard removal. I was able to swap out backplates for the cooler in our rig with the OEM cooler without issue.

As for wire routing, my initial concerns were confirmed. The pre-punched cable routing holes are rendered too small by the rubber grommets installed in them. This means I wasn’t able to route the modest sized cables on my Mushkin PSU; instead having to take advantage of other gaps in the case to clean things up as best I could.
I was able to route smaller cables like SATA and header connectors, but those are only a fraction of the cabling inside a computer. Even without the grommets to holes appear to still be rather small, though I was unable to remove them to find out. There are PSUs on the market that use cables with similar sizes like the ones made by CORSAIR or Ultra Products. Perhaps NZXT had these PSUs in mind when designing this case.

