Just One Cable to Consider

When you deal with most external monitors, you have at least a couple of cables to deal with. First, you have a VGA or DVI cable running from your computer to the screen. Second, you have a power cable for the LCD monitor. What this means is that you need to be close to a power outlet. The Mimo UM-710 doesn’t work that way. Instead, everything is run off a single USB connection, just like most webcams or computer mice. This is a lot more convenient, not only for the purpose of minimizing clutter, but it also means that you can use this device when you are not tethered to the wall outlet.
In general, you can provide your own USB-to-miniUSB cable to run the UM-710. If you find that it’s not working, Nanovision has also included one of those dual USB cables to provide some extra power as needed.
Screwed Through the Base
Since you can use this secondary display in either landscape or portrait orientations, you may be wondering how you would go about rotating it.

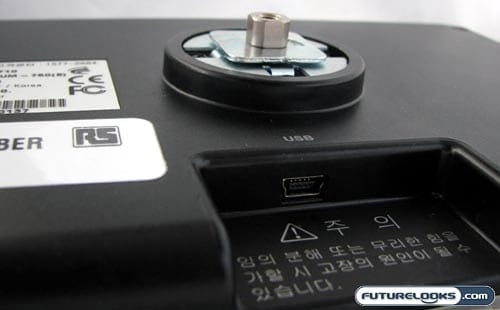
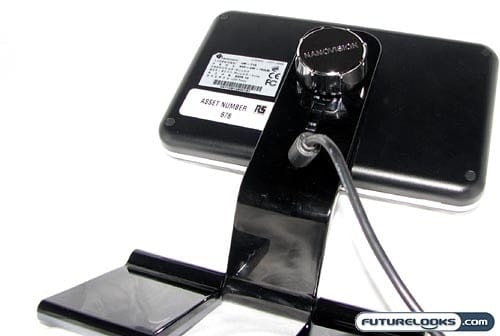
Well, installation is an absolute breeze, since the back of the screen has a single screw. Thread this through the slot in the base and screw on the back piece to keep it in place. If you want to rotate the screen, loosen the screw, rotate the screen, and tighten the screw again. Simple.
That said, the designers could have improved the cable management. It is impossible to access the mini-USB port on the monitor when it is attached to the base. You have to unscrew it first. It’s also a bit of a hassle to thread it through the provided slot in the base.
A slight adjustment in the design would have made managing this single cable a lot easier.
Simplified Controls
Remembering that this is meant to be a secondary display with secondary-level features, the Mimo UM-710 USB secondary LCD has kept the controls to an absolute minimum as well.

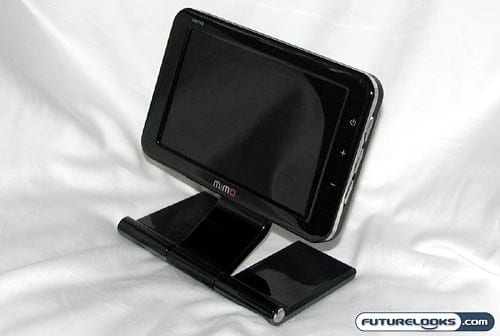
There are a total of three buttons and they are all located along the right side of the product. The top one is the power button, whereas the two below it are for adjusting the brightness level. Strangely, you cannot hold one of these brightness buttons to continually brighten or dim your display; you must click it continuously. I’m sure that this can’t be good for the “mean time before failure” of the buttons. That’s a little frustrating, but it’s a shortcoming that I am willing to overlook.
Any other real adjustments aren’t all that necessary, again remembering the primary functions for this secondary monitor. You don’t want to do any photo editing or video watching on here. However, it would be perfect for sliding over your Photoshop tools or running iTunes in the background. Again, completely secondary stuff goes here and it works well for that purpose.
