The Dark and Mysterious P55-GD65

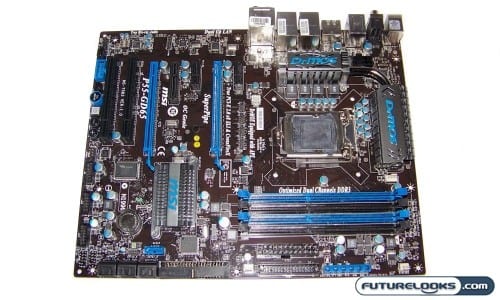
Let me just say that at first glance, I found the P55-GD65 to be one sexy looking ATX board.The color scheme sticks with matched blues, black sockets, and a really dark brown PCB that appears more black to the naked eye. Even the heat pipes and heat sinks follow suit fabricated with gun metal gray aluminum. Overall, it’s a really nice theme and it’s always nice to see vendors get rid of “old n busted” for the “new hotness”.
MSI labels the 8mm heat pipe sinks with DrMOS that cover the MOSFETs responsible for powering the processor. In reality, it isn’t the heatsink that is called DrMos, but rather the “Driver MOSFETS” below them.
MSI has invested a ton of money into these little components that combine three PWM components into one (two MOSFETs and an IC). By combining these components into one part, there are fewer parts used which produces less heat than competing designs. Normally, these components would heat up quite a bit, especially when overclocking. However, with DrMOS in the house, the heatsink is really more for show than anything else.

Since, the Lynnfield and P55 Chipsets return to using Dual Channel DDR3 memory, you’ll only need 4 DIMM slots. These slots can handle memory modules rated from 1333 MHz up to 2000 MHz. Don’t be surprised if you find that the system can reach upwards of 2400 MHz assuming that the memory in use can handle it.

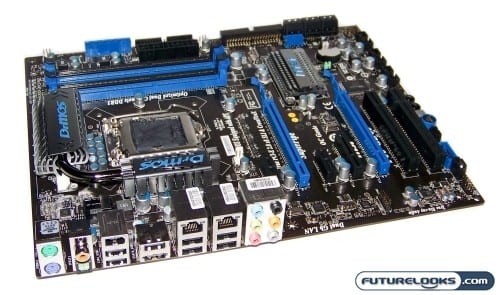
Overall, the general motherboard layout is pretty simple. Any expansion ports like USB 2.0, Firewire, SATAII, ATA/IDE, FDD, and Audio, are located on the edges of the motherboard. Both the ATA and SATA drive ports are horizontal, pointing cables away from the board and will aid in tidying. This should also help keep things nice and manageable. Speaking of Input/Output devices, there are plenty of expansion possibilities.
Along with the standardized Realtek 889 7.1 Channel ports, there’s probably more than enough connectivity for any PC enthusiast. If you haven’t dropped your USB storage drives, you’ll find the External SATA to be a much faster solution. And if that’s not enough, you can use one of the Dual GIGABIT Ethernet ports to squeeze every last bit of performance from your favourite NAS or server.

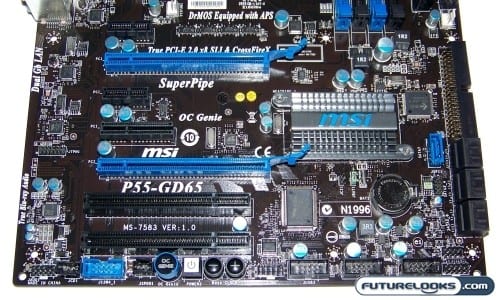
It’s nice to see some quality made buttons as well as capacitors and sockets in use near the bottom of the motherboard. The buttons are much nicer than those cheap tiny things that were used back on the old school 680-SLI motherboards. Somehow they made it onto some X58 boards too. There is also a lot more real estate that can be used for other things, like Oygen CMedia or Creative X-Fi Codecs thanks to the lack of chips needed for a P55 solution.
MSI’s OC GENIE (bottom) is the newest innovation that puts DrMOS to work. The concept is super simple.
First, you press the OC button which activates the GENIE (rubbing the motherboard not recommended). Then you use the Plus and Minus buttons to slowly increase the CPU’s Bus Clock by 1 MHz increments. That may seem like the slowest way to reach your goal overclock, but it can help by incrementally tuning the system for that insane maximum overclock you’re wanting. Patience is a virtue when it comes to seeking the ultimate overclock and we’ll go into this more in the coming paragraphs. But first, let’s setup a system and do some benchmarks.
