Power When Needed

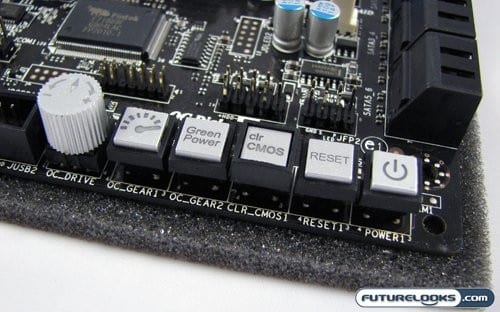
Getting things going on the MSI 790FX-GD70 is made fairly easy. First we have the M-connectors, which allow you to easily hook up all those annoying front panel connectors. If you don’t have those plugged in for some reason, MSI has installed a power and reset button right on the bottom of the board. They haven’t stopped there though. They also have a push button CMOS clearer, which thankfully has a guard on it to stop you from accidentally pressing it and . . . well clearing your CMOS. Those three buttons are actually becoming typical features on most high end boards.
The buttons (and dial) next to the usual suspects is where things get interesting. The Green Power button toggles the GreenPower function of this motherboard. This feature auto adjusts power phase of the components plugged into the board, to save the most power under various levels of operation. Now if you want a Corvette instead of a Prius, the next two buttons may be more your stripe. The OC Gear button and OC Drive dial work in concert to allow you to quickly and easily overclock your CPU for maximum performance. The increments of the overclock are adjustable in the BIOS. The only downside is you need to remove your case side panel to gain access to this dial.

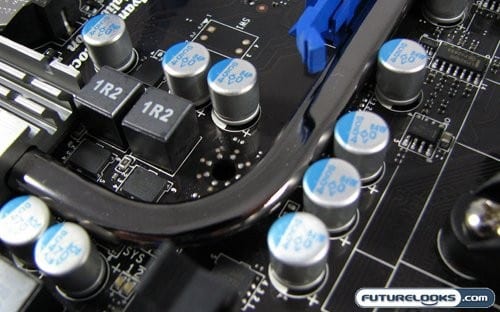
Now there is a minor warning in the user manual for the 790FX-GD70 motherboard that states you should increase the voltage in the BIOS first before tweaking the clock speed with the dial. This is a little out of order when it comes to standard overclocking processes. However, the MSI board is made with 100% solid state capacitors. Being used to their budget oriented boards in the past, this is a nice change to see. It should allow for some stable voltage increases to give you a lot of extra overclocking headroom.
Turn the Dial to 11

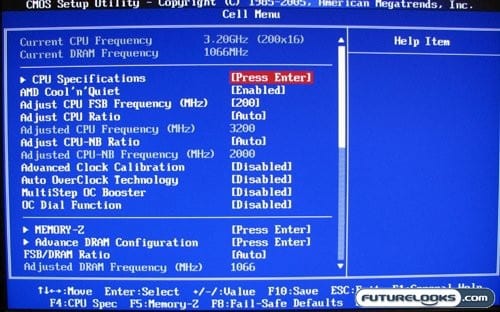
Even with the OC Dial on the bottom of the MSI board, you’ll still need to visit the BIOS screen for some tweaks. That’s where you run into the Cell Menu. This is the one stop shop for almost all overclocking function on the 790FX-GD70. Now you may be content with futzing with the little dial, adjusting speed in 1MHz increments (the default, which is adjustable). I still prefer a full featured BIOS menu and the fun of tweaking everything manually. Thankfully the Cell Menu contains a large array of tweaks for processor speed and voltage, memory voltage and timings, and a few other adjustments.
As for overclocking performance, I was rather happy with what the MSI board provided. For the sake of brevity I didn’t go into heavy tweaking mode, but with our test processor (an AMD Phenom II X4 955 Black Edition CPU) we were able to go to 3.6GHz without any issue. This is the same speed we hit with the GIGABYTE board we reviewed, and all we had to do with the MSI board was apply a little extra voltage as with the GIGABYTE board. Your mileage may vary of course.
