Test System Setup

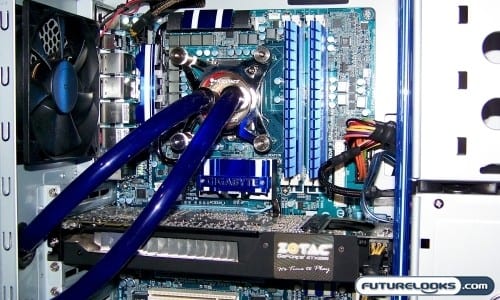
In order to run the system up to the rated 2133MHz that these modules are rated at, we needed a special system and here’s the liquid cooled beast used to test the memory. Keep in mind, you don’t have to use the same cooling method. A really good quality heatsink like the Cooler Master Hyper N620 CPU cooler would work just as well.
Here’s the rundown on the specs:
- Intel Core i7 870 LGA1156 Lynnfield Processor
- GIGABYTE GA-P55-UD5 Motherboard
- Kingston HyperX 2133MHz 4GB DDR3 Dual Channel (As Tested)
- Zotac Geforce GTX295 Graphics Card
- Kingston SSDNow V Series 128GB
- Antec CP850 Power Supply
We used Windows Vista 64 bit in all our tests and are still waiting for Microsoft to cough up our retail Windows 7 keys.
Even though the majority of the tests are based on benchmarking the memory, I still made sure that all of the hardware is utilizing the latest BIOS and firmware. Both, the CPU and Memory overclocking options were disabled in the BIOS so that we could get raw performance numbers.
Installation Notes
If you didn’t already know, your older DDR3 modules that are rated 1.9 Volts, and can’t be used with X58 or P55 based systems. That’s why the 2133 Kit is rated to 1.65 Volts to ensure compatibility with the Intel LGA1366 and LGA1156 processors. There are still stories of a few users trying to do this only to damage their system.
As with any P55 based system, once the memory was installed, you’ll have to select one of two XMP profiles detected by the BIOS.While the XMP Profile was correctly detected, yours might not be. If that’s the case, simply go into the BIOS and make the changes manually.
Overclocking The Stuff
Right away, Profile 1 auto selected the CPU Bus Clock frequency needed to set the memory to 2000MHz. That meant the CPU was now being overclocked to about 3.8GHz. But wait! There’s more!

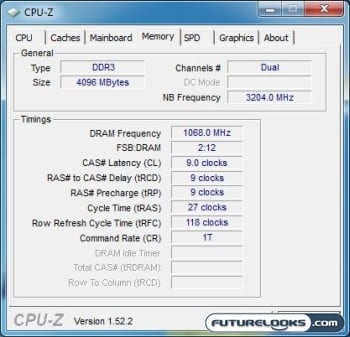
Profile 2 set the CPU BClk even higher pushing the CPU’s frequency to close to 4GHz just so the 2133MHz DDR3 frequency could be maintained. The timings were correctly detected at 9-9-9-27 requiring only 1.65 Volts. But we’re not done yet!

Next, I manually pushed the CPU BClk ever so slightly higher, till the memory’s frequency was at 2208MHz at 9-9-9-27 timings. Despite adding more voltage, the memory would not maintain stability any further using CAS 9 timings. There’s more frequency up to about 2250 MHz, but the CAS 10 timings just negate any performance gains, and could risk the ruining of the memory modules. This pushed the CPU past 4GHz of course.
Now, you can understand why it’s very necessary to choose an extremely capable motherboard when you’re considering DDR3 memory this fast. It is very frustrating when you spend top dollar on the best stuff available, just to find out the cheaper motherboard is the culprit and you’ll have to tear the system apart to replace it to get all the performance you paid for.
