Inputs and Outputs

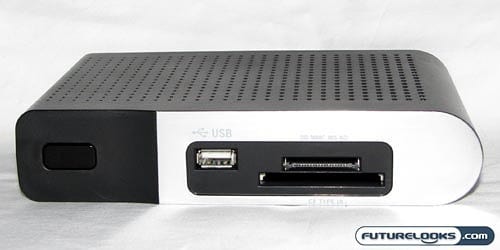
The key appeal with a product like this is that you don’t have to bother burning your photos, music, and movies onto a blank CD or DVD. There’s no need to bother with an optical drive, because the content can be shared using flash memory instead. Looking to the front of the Hi-Den Vision, you see a single USB port where you can insert any number of different USB devices. The typical solution would be to use a standard USB flash drive, like the Kingston DataTraveler 150, but you can also hook up a larger external hard drive if you prefer.
Next to the USB port are a couple of slots for flash memory cards, supporting SD, SDHC, xD, MMC, MS, and CF cards. In this way, you can take the memory card out of your camera and insert it directly into this set-top box for instant photo sharing. I did seem to have some issues with my SDHC card, but it had no trouble reading the data from my much smaller 64MB SD card.

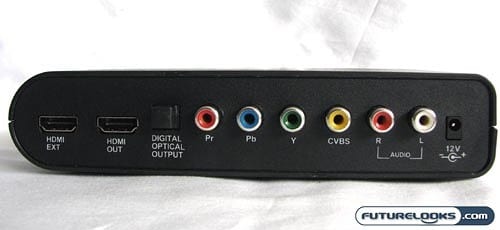
All of the outputs are located on the back of the Hi-Den Vision. The interesting thing is that you’ll see two HDMI ports. That’s because this device can also serve as an HDMI switch (more like a passthrough), allowing you to connect a secondary HDMI product (like a Blu-ray player) and having its signal also reach your television. Obviously, you wouldn’t be able to use both products simultaneously.
Next to the two HDMI ports, you’ll see a digital optical output, connectors for both composite and component video, RCA stereo audio, and the DC power port. The inclusion of digital optical output is a notable one, because it means that you can enjoy 5.1-channel audio from files that have been encoded as such. Unfortunately, I found that the HDMI connection was spotty at best. It wouldn’t always display on my Samsung HDTV for some strange reason, though I didn’t run into any issues using the composite video connection.
Remote Control and Menu Interface

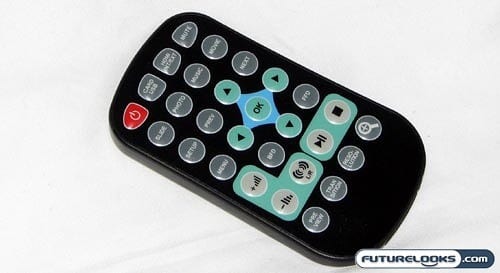
The included wireless remote is of the standard “credit card thin” style that you have probably encountered with some other consumer products in the past. It didn’t seem like anything out of the ordinary, but the layout of the keys does make the remote feel a little cluttered. Since all the buttons are the same size and are aligned on a grid, there isn’t as much of a differentiation between their respective functions.
The top row of the remote shows the power button (in red), a button for switching between card and USB inputs, a button for the HDMI switch, and the mute button. The second row is where you select the current play mode, switching between pictures, music, and movies.
This is because it is not possible to sift through your music collection while you are in movie mode, just as you can’t check out your video files when you are in picture mode. This is a double-edged sword insofar that you do not have “extra” files showing up when browsing through the contents of your USB drive, but it also means that you have to exit out of your current mode to the “correct” one to access certain files.
