Let’s Install This Thing

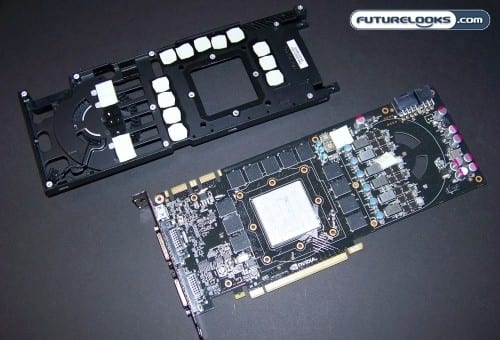
The first step in the installation process is to remove your stock card’s GPU cooler and shroud, or housing if applicable. The GTX480 we’re using here has quite a few screws holding both of these in place. Once the card was stripped, the GPU IHS was thoroughly cleaned with Arctic Clean Thermal Remover and Purifier. We made sure it was as clean as a washed dinner plate.
Next, following the ICY Vision manual, the appropriate standoffs were pre-installed on to the chrome base plate. Then, the base plate was screwed on to the cooler’s base. Other than spreading on some heatsink paste, that’s it for the cooler prep.

Now, all of the included aluminum heat sinks find their place. There should be enough to cover every heat producing component whether it be an ATI or NVidia card. Our particular GTX480 only needed so many for video ram leaving a few extras. The sinks that would normally line the MOSFETs next to the PCB fan hole are spread a little wider than the sinks can completely cover. We suspect GELID will either extend those three or add three longer ones since they aren’t exactly costly and would add value to the overall package.
Finally, the included thermal paste was applied to the GPU IHS and spread evenly. It’s hard to know if thermal paste is good stuff or not. But, usually, its consistency gives us a hint. The stuff they include seems a little on the dry side which could bode poorly in quick testing, but as we’ve found out in the past, GELID Solution paste is quite good if you give it time to setup.
Test System Setup
Testing was kept simple and based on real world scenarios. In other words, the GTX480 was stressed under full load using intense 3D applications. Temperatures were taken when at full load, desktop load, and when idle. We also take noise level readings to give you an idea of how the stock and the new hotness compare.
- Intel Core i7-980X Gulftown Processor
- CPU Cooled By: Zalman CNPS10X Extreme
- GIGABYTE GA-X58A-UD5 Motherboard
- Patriot Memory ViperII 6GB 2000MHz DDR3 Memory
- ZOTAC Geforce GTX480 Graphics Card
- Cooler 1: Reference Cooler
- Cooler 2: ICY Vision (as tested)
- Kingston SSDNow V+ 128GB SSD
- Antec TPQ-1000 Watt Power Supply
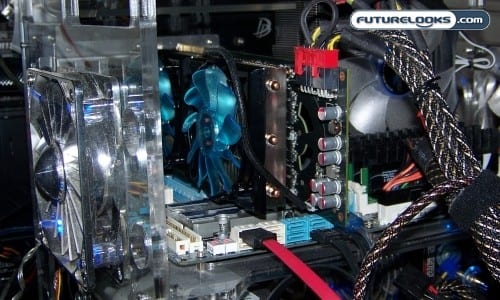
- Test Enclosure: DangerDen Torture Rack
For our test environment we measured ambient temps at 20C which was the norm during testing. If you live in a hot region and/or your computer case is poorly ventilated, your temps will definitely be higher.
Preliminary Test Notes

Users should keep in mind that the height of the ICY Vision cooler may or may not allow for certain SLI or CrossfireX configurations. This will depend on the placement and proximity of your motherboard PCIE slots. If your PCIE slots are a little farther apart than normal you’re good to go. In some scenarios, you might find that longer and more flexible SLI/Crossfire brides are all that are needed to seal the deal.
While all the heat sinks kind of round off the kit, they aren’t as polished as the GPU cooler. They are essentially made from the simplest form of aluminum and don’t completely match the theme. It would be nice to see a little extra something that would “wow” the onlookers. But the produce is going for value so we can forgive that.
In our test of the ZOTAC GTX 480, we realized just how hot nVidia’s new chip and reference design get. Obviously nVidia engineers know what they are doing when they create a cooler right? Let’s see if that holds true in our head to head test.
