BitFenix Neos – Mounting Components
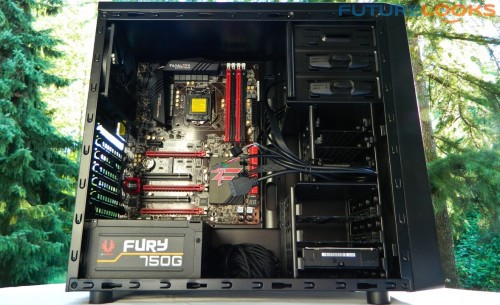
In order to give the case a proper real world test, we installed a system consisting of the following components:
- CPU: Intel Core i7-4770K,
- Motherboard: ASRock Fatal1ty Z87 Professional
- GPU: NVIDIA GeForce GTX 780
- RAM: Kingston HyperX 8GB DDR3 low profile memory kit
- Hard Drive: Western Digital 1TB Caviar Green hard drive
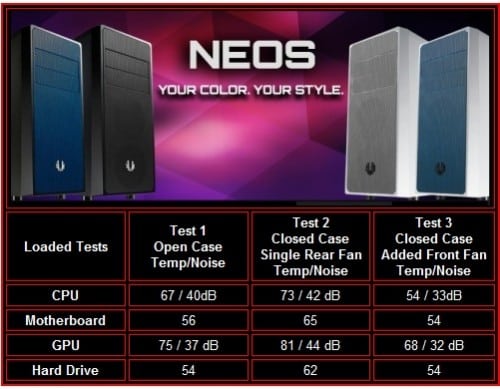
The CPU cooler was an retail Intel CPU cooler that maxes out at 45dB a full speed. Temperatures were recorded at 30 minute intervals with the side panel off and side panel on.
As with any smaller mid-tower enclosure, a little planning and patience is required especially if you have big hands. We recommend installing the motherboard first otherwise it’s a very tight fit between the PSU and top of the chassis. Once installed, you’ll have just enough room to access headers and wiring. As affordable enclosures go, there isn’t any real usable space behind the motherboard tray so you’ll have to pay attention to cable management.
We’ve seen cases perform much better with an optional 120mm fan, so we’ve mounted one for some additional testing and data points.
BitFenix Neos – Thermal Testing
From the table, you can see that the system was not only hotter (as measured in Celsius), but also louder with the panel on. That’s because there’s very little cool air being pulled inside or directed to the components. However, adding a bottom front 120mm fan forced temperatures down, and allowed the stock cooler a bit of relief in both temperature and noise. It’s a shame that the case doesn’t come with one, allowing it to be ready to go out of the box.
Given the temperatures recorded, and the fact we did not use a discrete GPU, the temperatures would be even higher. If you run a discrete GPU, that second fan in the front is a definite non-negotiable add on.
BitFenix Fure 750G – Closer Look
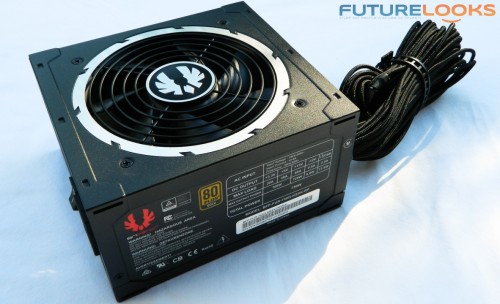
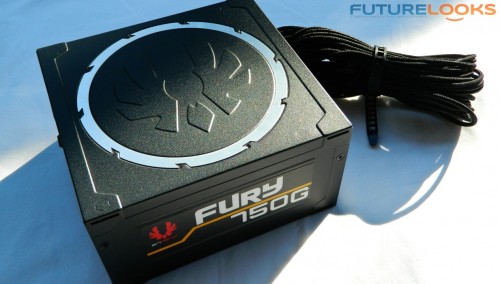
The new BitFenix Fury series of power supplies completes a hole in the company’s component line up. Here, you can see the silver bladed theme which is similar on both sides of the unit’s chassis. The fan side faces downward to draw in cool air and expel out the back so you’re not going to see this side very often.
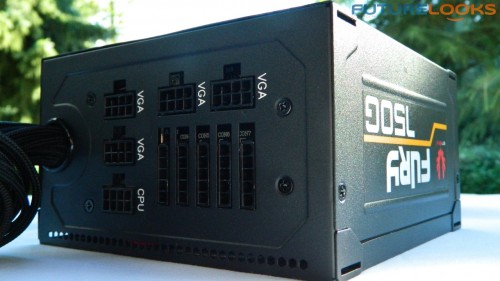
This is the side users will typically see. I kind of wish the BitFenix wing was matching silver, or red. There are many modding possibilities for enthusiasts. In terms of the paint, the chassis itself has a finer black powder coat which adds durability. Especially if you plan on keeping the power supply for upcoming builds.
In terms of modular cabling, users will find SATA and IDE 4pin power cables fit the slender CON ports. Naturally, the four VGA are labeled to support graphics cards up to two graphics cards maximum. The CPU is the 8pin EPS/ATX connector that plugs in next to your CPU socket. The sockets are shape specific as always.
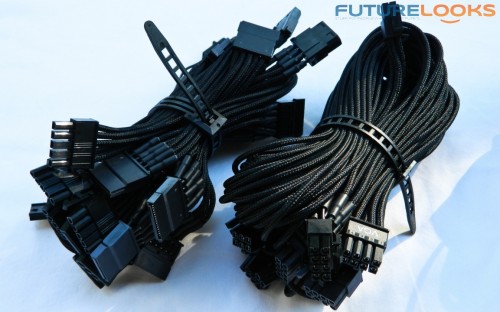
The cabling is individually braided. While this is always a really neat unique look, that process is time consuming which most certainly drives up costs. Fury units come with 1 x 8pin CPU, 4 x 8pin VGA, 3 SATA strands, 1 Molex 4pin strand, 1 combo SATA+Molex, and 1 Floppy cable. Refer to the specs section from earlier if you’re curious as to how many connectors are on each strand.
Internally, the BitFenix Fury 750G has the heart of an FSP Group factory build. The key points of interest are the Rubycon 450V 390uF capacitor that keeps current moving during operation. This is a decent capacitor, especially when coupled with good quality MOSFETs which, unfortunately, are attached to an unusually small heat sink. This could mean higher operating temps, and may result in higher fan RPMs which generates more fan noise. No one likes a noisy PSU!
Hopefully this will not be the case as we load this power supply down for some testing, coming up next.

