Features and Specifications
In order to live up to this pursuit of the essence of sound, ASUS has given the Essence STX a number of features that are not found in your average run of the mill sound card. In fact, even their XONAR D2X Sound Card, which is a spectacular product by any measure, doesn’t go nearly as far as this card goes in creating audio nirvana.

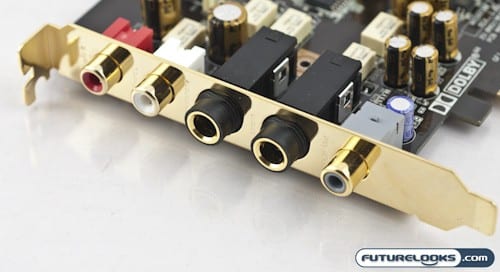
For starters, this card has no 7.1 analog audio output jacks and is two channel only. In fact, they’ve done away with the puny 3.5mm audio jacks and have opted for two 6.3mm full sized audio jacks; one acting as a headphone jack and the other is a MIC In/Line In jack used for things like instruments and high end mics. The headphone jack, which is the heart of this card is driven by a high-quality TI TPA6120A2 headphone amp. Audio geeks will also recognize the Burr-Brown PCM 1792A Digital Analog Converter (DAC) that is onboard and is responsible for an impressive 127dB signal to noise ratio.
Analog RCA outputs are also included and feature an ultra-clean 124dB SNR (signal to noise ratio) and ultra low distortion (0.0004%), which is great for hooking the card up to a quality outboard power amplifier or even a tube amp. This output is driven separately from the headphone jack to eliminate interference.
Rounding this out is a COAX/TOSLINK Combo digital output jack that gives you 192KHz/24bit output. This is perfect for hooking the card up to an AV receiver for surround sound decoding. However, I have a feeling that this was more of an afterthought because headphones is what this card is all about. The top of the card has connectors for front panel jacks, which I would probably skip and go direct on this one.
If you’re after even more detailed specifications, you can find them on the product home page. For the rest of you, upward and onward to the good stuff.
Underneath The Tiger…
Removing the EMI and Copper shield (a large piece I might add), which seals the RCA and Headphone outputs from noise, reveals some more interesting features about this card that are distinctly audiophile…

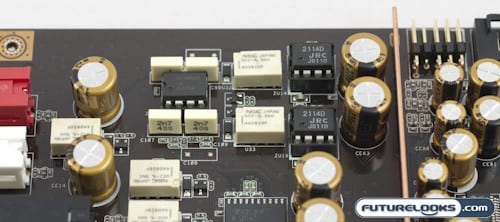
Because audiophiles tend to tinker with their gear, soldering in components to tune the sound to their specifications, ASUS decided to include a set of socketed OPAMPS that you can swap out if you don’t like the sound of the stock LM4562 and JRC2114D units. This also does away with the soldering for an easy swap to get the sound that you like whether it be colder or warmer like a tube.
You’ll also notice an abundant amount of these Nichicon “Fine Gold” professional audio capacitors. These are far larger than the ones seen on other sound cards and responsible for creating the deep clear bass and crystal clear high frequencies that we will be experiencing shortly.
Installation and Setup

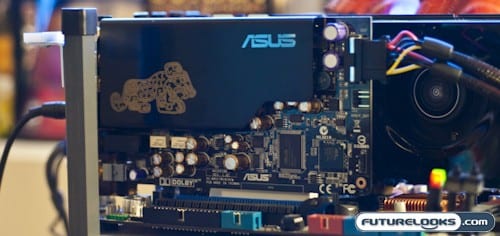
Physical installation was a breeze and merely required locating an empty PCI-Express slot and dropping the card in. You will need to plug in a four pin MOLEX power connector to supply power to the card. Installation of the software follows and you should be greeted by a fairly uneventful and quick process of hitting the next button till the end. Once that’s done, a reboot of the system is required and you’re off to the races.
The only thing left to setup upon reboot is the impedance of your headphones through a drop down in the software once you’ve selected the two channel option. The card supports tiny earbuds to full sized audiophile cans that require a 600 ohm impedance.
I did find it strange that there were options for multichannel configurations. Hopefully a future software revision could remove them and create a decidedly more two channel audiophile tuned UI as it looked no different than the control panel for my ASUS XONAR D2 Audio Card, minus the headphone impedance drop down. As an audiophile card, I also found the different manipulated audio modes distracting, but different strokes for different folks.
