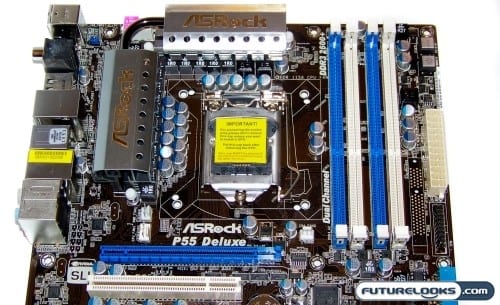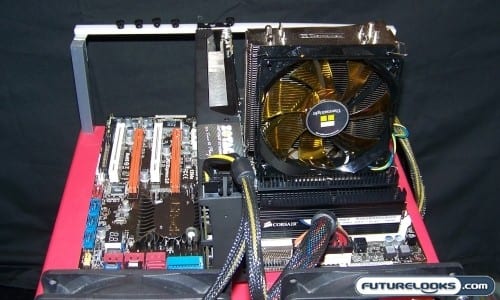
A couple of things that convey the feeling are the heat pipe heat sinks over the power management components. These look like they can really do some cooling as well as improve the overall theme of the board. The only thing that doesn’t fit is the Southbridge heat sink with its sun-like design. I’m sure something nicer and probably cheaper could’ve been designed to match the heat pipes.
The southern region of the board kind of leaves me questioning the use of orange PCIE slots instead of either blue or red slots. I understand that they’re probably there to attract attention to the fact that this is a triple PCIE slot motherboard (or maybe they were on sale at the PCIE slot supplier), but a matched theme goes a lot further with the consumer and especially gamers.
One thing we can all appreciate is the fact that all of the USB, Firewire, SATA, ATA, Floppy, Power, and HD audio ports are all kept near the outer edges of the motherboard. This helps keep cables out of the way of important components with moving parts, like fans. The SATA and ATA data ports are horizontal further simplifying installations.
While this may not be important to everyone, it’s quite useful to all end users. ASRock engineers included good quality Power, Reset, and Clear CMOS buttons. The Power and Reset are located next to the memory which is an area where there is less likely to be wiring crowding their function. And, an ever so useful CMOS reset button is on the back of the motherboard.

If you take a look at the back, you can see plenty of the usual features like USB 2.0, eSATA, Firewire, Dual GIGABIT Network, including the CMOS reset button next to the PS2 ports at the top. The analog audio, coaxial out, and optical out ports are powered by a Realtek ALC890 Audio Codec which supports Blu-ray, DTS (Digital Theater Systems), and is rated to do so in the 110dB dynamic range. We will be testing this new codec out farther down.
Installing the ASRock P55 Deluxe
We’d like to thank ASRock for creating another issue-free installation. The board booted up so easily without needing so much as a setting changed. However, we like to check out things like the BIOS at the start. Before getting to far ahead, I flashed the BIOS so we can see what’s really going on under the hood.
It’s easy to navigate through the BIOS. There aren’t a lot of extra intricate BIOS settings This is actually not a bad thing. We’ve messed with plenty of advanced BIOS features around here and very rarely do any of them actually help improve stability especially when overclocking. It most often comes down to the meat and potatoes of BIOS settings like CPU Bus Clock, Memory Dividers, Frequencies, Voltages, and various CPU regulation settings.
Once the system was patched up, drivers updated, and ASRock P55 disc utilities installed, the system went through all its normal paces right up to working well with the OC Tuner. We can all appreciate an uneventful, blue-screen free installation!
Test Systems and Notes

The assembled test systems below were all updated with the latest BIOS, video drivers, and motherboard drivers. Video drivers were left set to 3D Quality, AA/AF left to Application Decides but set to 8X AA/2X AF in program, and Vertical Sync was Disabled. Here’s the break down:
- Intel Core i7 870 Lynnfield Processor
- ASRock P55 Deluxe
- Intel DP55KG Extreme
- Patriot Memory 4GB 2000MHz Sector 5 Dual Channel
- Zotac Geforce GTX295 1792MB Graphics Card
- Kingston VSeries Plus 64GB SSDNow
- Antec CP850 Power Supply
The benchmark programs used included SANDRA CPU/Memory Bandwidth, Cinebench R10, PCMark Vantage, 3DMark Vantage, Crysis, and RightMark Audio. The system’s USB, Sata, and eSATA were also tested just in case we find some weaknesses in the motherboard’s drivers or functions.
