On the Inside

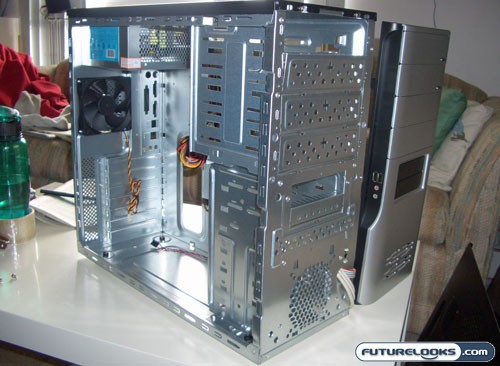
One thing that I immediately noticed upon opening our case was that most of the edges were rounded off. This will protect us from cutting ourselves when we’re in there installing all of our components. At least they didn’t cheap there. Bleeding is a bad thing. Included was a bag of screws, a 300W power supply, a power cord, and an 80mm fan installed on the rear of the case to exhaust hot air.

Another thing that I liked was the air guide to direct the hot air from the CPU out of the case. This should help to keep case temperatures down as the hot air is vented directly out instead of mixing with the other air before being expelled. One thing to point out though is the inability to adjust the length of this guide. If your using a larger CPU heatsink/fan, this may cause some fitment issues.
The front of the case also allowed for an additional 80mm fan. This will ensure air flow from the front to the back of the case if your components are running a little warm. Since the components that we’re installing today aren’t too high powered, I saw no need for an additional fan.

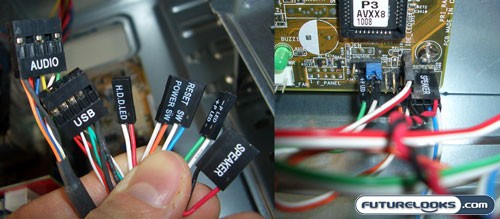
As usual, all of the front panel cables were given adequate length and were clearly labeled. Also included was an instruction sheet detailing the purpose of each connector as well as installation instructions, great for first time PC builders. I also liked the little legend that directed us which holes to screw in our motherboard spacers. The case allows for ATX, Mini-ATX, and Micro ATX motherboards. There is lots of room in the case to work with. Too bad there’s no removable motherboard tray, or removable hard driver / optical drive bays. Again, I remind myself that this is a budget case.
Hardware to be Installed
In order to see how did case did in the real world, we threw together a system with the following components…
| Components | Description |
| Motherboard | ASUS A7V8X-X |
| CPU | AMD Barton 2600+ (@ 1.90GHz) |
| Heatsink / Fan | Thermaltake Volcano 5 |
| Ram | 2×512 MB DDR400 |
| Harddrives | Western Digital Caviar 200GB |
| Maxtor 60GB | |
| Optical Drives | BenQ 16X DVD-R/W |
| Videocard | Powercolor Radeon 9800Pro |
| Soundcard | Creative Soundblaster Live value 4.1 |
The components are a couple years old, but given the price point of the case, putting some top drawer components would be a bit of a waste. However, they should still provide us with an idea of temperature and noise levels inside the enclosure.
