A Look Inside
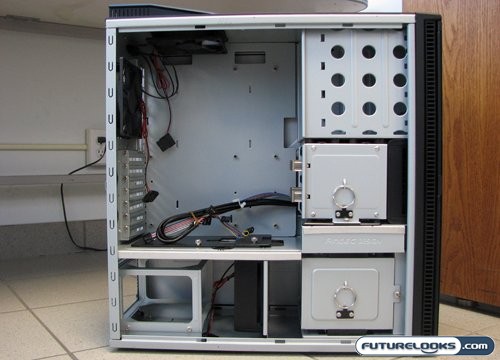
Getting into the P182 is fairly easy. The left side panel, which is of course the one that will be opened the most, can be removed by simply undoing two thumbscrews. The right panel is held in place by three standard case screws, and requires a screwdriver to be removed. As mentioned before, the panels don’t transmit vibrations (knocking on them simply produces a thud). This is due to a triple layer design of metal, sound dampening, and metal again. The one thing that isn’t removable in the P182 is the motherboard tray. Although a removable motherboard tray can be convenient, the P182 is roomy enough to render it unnecessary for most ATX motherboards. Extended ATX motherboards need not apply here.
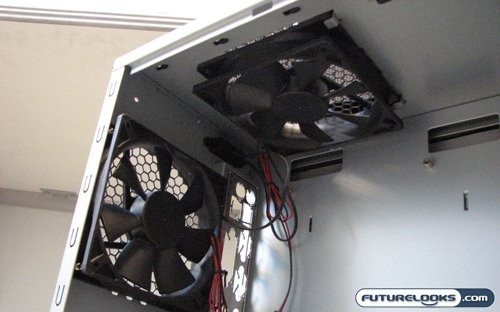
The Antec Tricool fans located at the top and back of the case provide most of the cooling for the top chamber of the case, as well as exhaust most of the heat radiated from the CPU. These are controlled by the afore mentioned three speed fan controller, located directly above the rear ports. The lower speed is whisper quiet, while medium is slightly louder, and high sounding like…some rather loud fans.
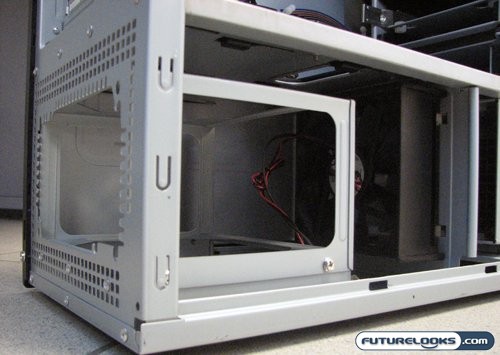
The lower chamber is cooled by a single 120mm Antec Tricool fan, which pulls air from front to back in the same fashion as a wind tunnel. The airflow created by this fan will also cool the lower hard drive rack, and provide fresh air to the power supply. Now this is a Tricool fan, and as such has a three speed controller of it’s own wired in line with the power cable. Unfortunately this means you need to open the case the set this fan. With this fan it’s best to find the sweet spot for noise vs. performance, set it, and forget about it.
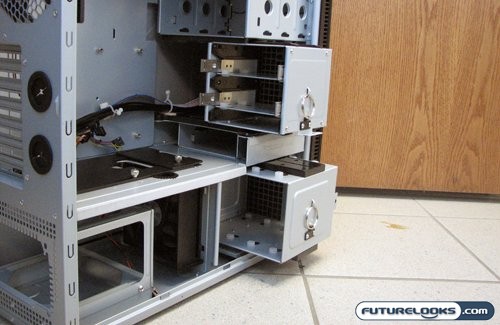
Both hard drive racks in the P182 are easily removable. You need only remove a single thumbscrew and slide them out the side of the case. Removal of the upper rack gives you access to the upper 120mm fan holder, which when installed provides cool fresh air for the upper chamber in general and the video card in specific. This rack may also need to be removed to accommodate extremely long video cards. Removal of the lower rack reveals nothing much at all. There isn’t a fan holder behind the lower fan filter, making the only fan in the lower chamber the one between the power supply and the hard drive rack. With the cable management system Antec setup in the P182, this area is clearly for hard drives only (and any stray cables you may need to shove in there).
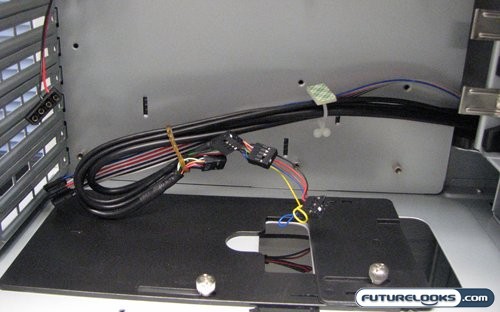
To maintain separation between the upper and lower chambers, Antec uses the plastic panel to allow only the exact amount of room you need for your cables. The plates are easily adjustable, and though not conveyed in the picture, an ample amount of cable pass-through room can be created. The only installation issue one may have is if they try to install any water cooling components in the lower chamber, which is exacerbated by the plates being irremovable. However that won’t be very common, as the lower chamber lacks an appropriate fan holder to bolt on a radiator, or flat surface to mount a pump. Antec also includes cable clips and reusable zip ties to hold cables in place, and has added some slots between chambers on the back of the motherboard tray to route cables, keeping cable clutter to a minimum.
Real-Time Price and Stock Check – Shop Like a PRO!
